Learning An Efficient Concealed Carry Draw
Concealed carry doesn’t exist in a vacuum. The reason we carry a defensive sidearm is because we understand that there may not be a police officer around when we need one the most. As such, there is a need to learn to draw and shoot from concealment. That gun on your belt isn’t there to make you feel better. That’s just a side effect. The primary reason why we carry and learn a concealed carry draw is because we know that one rather awful day, we may need to draw a gun to save a life.
A quick review. We’ve shown you how to shoot the concealed carry permit test in a number of different states. You know how to aim a pistol and shoot it without jerking the trigger. The Four Rules Of Gun Safety are a part of your everyday life. You’ve figured out how to carry all the time, you know what to carry besides your gun, and you know how to find a good holster to use with your pistol.
Now, let’s put all of this together and work on how to draw a pistol from concealment.
The Theory And Practice Of A Concealed Carry Draw
Let’s be clear about one thing, right up front: your gun comes out of its holster for only three reasons.
- You need to engage a target when there is imminent danger to life in your vicinity.
- You’re practicing, competing in a match, or taking a training class that requires you to draw from a holster.
- You need to perform administrative work on your gun, such as placing it in a safe or unloading it for repairs or other purposes.
Note that “Showing your gun off to your friends” is not one of the reasons listed here, neither is “Playing around with it because it’s a really cool gun.”
A concealed carry gun needs to stay concealed in order to be effective, so keep yours out of sight until it’s needed. Which is hopefully never.
The process of how to draw a pistol that we’re going to show today is based, in large part, on what Craig Douglas teaches in his excellent “Extreme Close Quarters Concepts” (ECQC) class (Craig, I apologize if I don’t say things quite as well as you taught them). The great thing about this draw technique is that it’s effective no matter how close your opponent is to you. We’ll be showing a draw from strong-side hip, using a loose T-shirt as a concealment garment. This is how I’ve carried for the last decade. Learning how to draw from pocket carry and Appendix Inside the Waist Band (AIWB) carry will have their own posts at a later date.
Learning The Concealed Carry Draw
Right away, we run into a problem. For safety reasons, there are very few ranges that allow their patrons to draw from a holster. This presents issues for people like us who have the desire to improve our pistol skills, but suddenly find there is no place to do so. Fortunately, there is a way. We’re going to break down how to draw a pistol into four steps. All of these steps can be done at home, with either a blue plastic training gun or a gun that is verified unloaded. If you choose to use an unloaded gun, make sure you’ve visually and physically inspected the chamber, magazine, and magazine well to make sure there are no rounds in the gun. For additional safety, there should be no live ammunition in the room where you are practicing your draw.
Secondly, let’s define a couple of terms, namely, strong hand and weak hand.
Your strong hand is what you write with. It’s the hand that goes on the pistol first. Your support hand is your other hand (the left hand, for righties). It’s there to help keep everything on target.
Four Steps To A Smooth Draw
Even though learning how to draw a pistol can be broken down into four steps, you should practice it as if it were one smooth, continuous process. Don’t pause or stop in-between steps. Rather, work on making it as fast and smooth as possible.
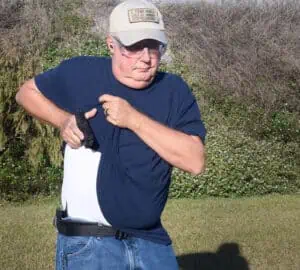
Step One: Clear Your Cover Garment and Grip Your Gun
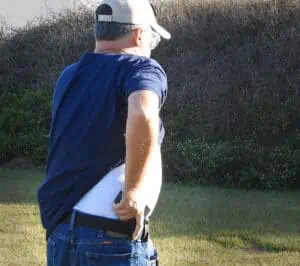
This is the foundation of a good draw. Mess up on this step and the rest of your draw is going to be rather ugly. This is why holster selection is so important. If your current holster won’t allow you to get a firm firing grip on your gun before it comes out of your holster, get rid of it. The last thing you want to do is tap-dance with your fingers as you point the gun toward the target. The time to get a good grip is before your gun comes out of your holster, not after.
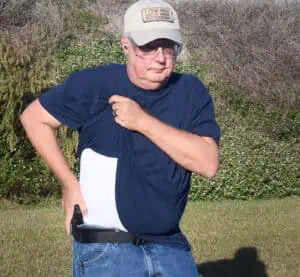
To clear a cover garment on your strong side, move your support hand around and grab your cover garment as low as possible. Your strong hand should already be moving, clearing the garment as well. As your garment rises, let go with the strong hand and grab your gun. Your support hand then keeps on going, right up to your armpit, taking your support garment out of the way of your draw.
Step Two: Draw the Gun from the Holster And Rotate It Forward
If your gun doesn’t come up quickly out of your holster during this step, get rid of it. A holster that doesn’t let go of your gun when it’s needed the most is just as useless as a holster that lets go of your gun when it’s not needed.
The instant your gun clears the holster, rotate it forward until it’s at a 45 degree angle. This will allow you to engage a target that is within contact distance, without exposing your gun and allowing a threat to easily grab it away from you.
Step Three: Rotate The Gun More and Bring It Upwards To Your Chest
From the second position, it’s easy for your support hand to let go of your cover garment. Your support hand then moves to your chest, where it rests flat, waiting for the next step. Your strong hand, with the gun in it, moves upward from your waist. It stops when it reaches your pectorals (or thereabouts). The gun rotates forward even more and is now pointing completely forward, snugged in tight to your chest. The thumb of your strong hand is lifted up slightly from the gun, creating some distance between the gun and your clothing. This does two things.
- It places the gun within your peripheral vision, allowing you to make more-accurate hits.
- It creates space for the gun to cycle without getting caught in your clothing and malfunctioning. This would be a bad thing, indeed.
From this position, with the gun rotated forward, it’s quite possible to get significant, effective hits on targets out to 5 yards away, while keeping your firearm tight against your body.
Step Four: Clasp Your Hands Together and Bring The Gun Forward
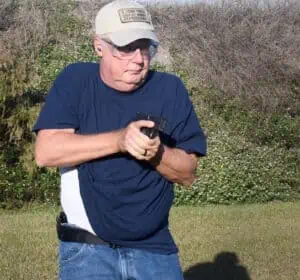 This step sets up the trigger press and how you’ll see your sights. Move the gun to your centerline and grip it with your support hand. The gun should be right in front of your heart and should still be pointed towards the target.
Now, pause for a moment and look where your gun is. It’s level, flat, and pointed right at your target. Can you make combat effective hits in this position? You better believe it.
If you’re dealing with an attacker who is just a few yards away, the last thing you want to do is stick your pistol out there where he or she can grab it away from you. Keeping your gun so it’s always your gun, and not someone else’s, is an essential part of the concealed carry draw.
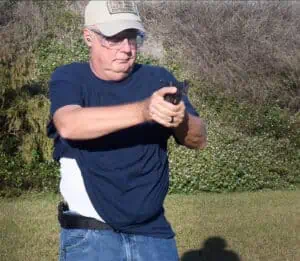
Keeping the gun level as you move it out allows you to pick up your sights in your peripheral vision
Another essential part of learning how to draw a pistol is setting yourself up to hit the target on-demand.
The other three steps have set you up for success, now it’s time to bring it together. Point your pistol towards the target. It’s flat, and the sights are in your peripheral vision. From here, it is a simple matter to smoothly press the gun towards the target and place your finger on the trigger if you have made the decision to shoot. Having the gun in this position allows you to pick up the sights as the gun gets pressed out to the target, saving you valuable fractions of a second at a time when every second counts.
Put Things Away When You’re Done
Safely re-holstering your pistol is the finishing touch to a good concealed carry draw. You want to keep your gun safe at all times. Keeping it in your holster when not in use is quite safe, indeed. This is where the need for a quality holster shows up. You want a holster that stays open whether your pistol is in it or not. Trying to place a loaded gun safely in a holster can be harder than you think. It’s even harder under the simulated stress of competition, and (thankfully) I can only imagine was it’s like after an armed defensive encounter.
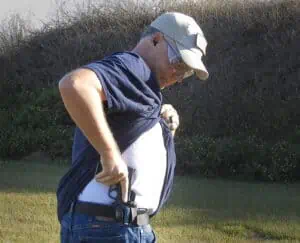
Getting shot by your own gun hurts just as much as any other gun, so pay attention when putting it back in the holster
There are some people who say you should never take your eyes off your attacker if you need to reholster your gun after an attack. I’m not one of them. Fumbling around having your gun go “BANG!” and dropping a round into your thigh with your own gun is just as bad as having a bad guy shoot you in the leg. Besides, you’ve either stopped the threat or you haven’t. If you haven’t stopped the threat, why are you putting your gun away? If you have, well, they’re no longer a threat and you can concentrate on other things, like keeping an eye on your gun as it goes back into your holster.
Practice Makes You Closer to Perfect
Getting into the habit of carrying your gun is one step in the process of carrying concealed. Learning the skills, such as how to draw a pistol safely and quickly, is a big part of making the change from being just another gun owner to someone who can effectively defend what matters most to them should the need ever arise.
And let’s hope it never does.

